In today’s fast-paced world, remote access to computers has become an essential aspect of work. The Remote Desktop Protocol (RDP), developed by Microsoft, allows users to connect to and access remote devices over the Internet. By default, RDP uses port number 3389 for communication. However, due to security concerns and the need to work around firewalls, it is advisable to change the default RDP port. In this comprehensive guide, we will explore different methods to change the RDP port and enhance the security of your remote systems.
Why Change the RDP Port Number?
The default RDP port, 3389, is well-known to hackers, making it vulnerable to brute force attacks and unauthorized access attempts. Changing the RDP port number adds an extra layer of security by making it harder for attackers to identify the listening port. Additionally, some firewalls may block incoming and outgoing messages to and from port 3389 as a security measure. Changing the port number allows you to work around these restrictions and ensure uninterrupted remote access to your systems If you want to run scripts bots, you will need to change port number according to the software, you might need a botting RDP to run 24×7 scripts.
Method 1: Changing the RDP Port Using the Windows Registry
The Windows Registry is a powerful tool that allows users to modify system settings, including the RDP port number. Follow these step-by-step instructions to change the RDP port using the Windows Registry:
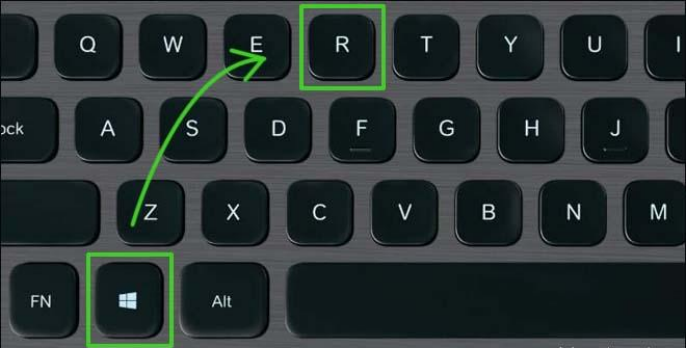
- Press the “Windows + R”keys on your keyboard to open the Run dialogue box.
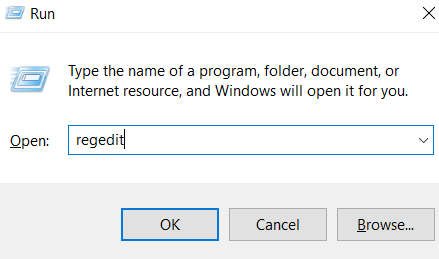
- Type “regedit”in the Run box and press Enter to open the Windows Registry Editor.
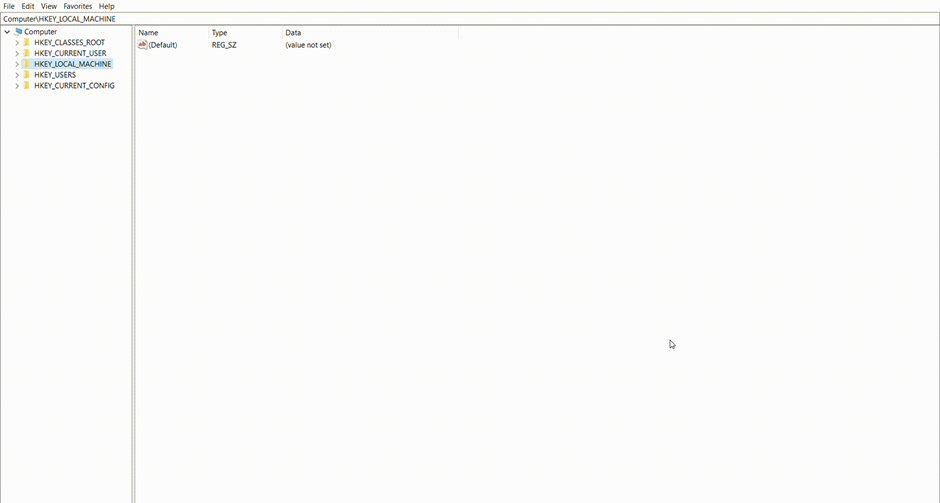
- Navigate to the following registry subkey:
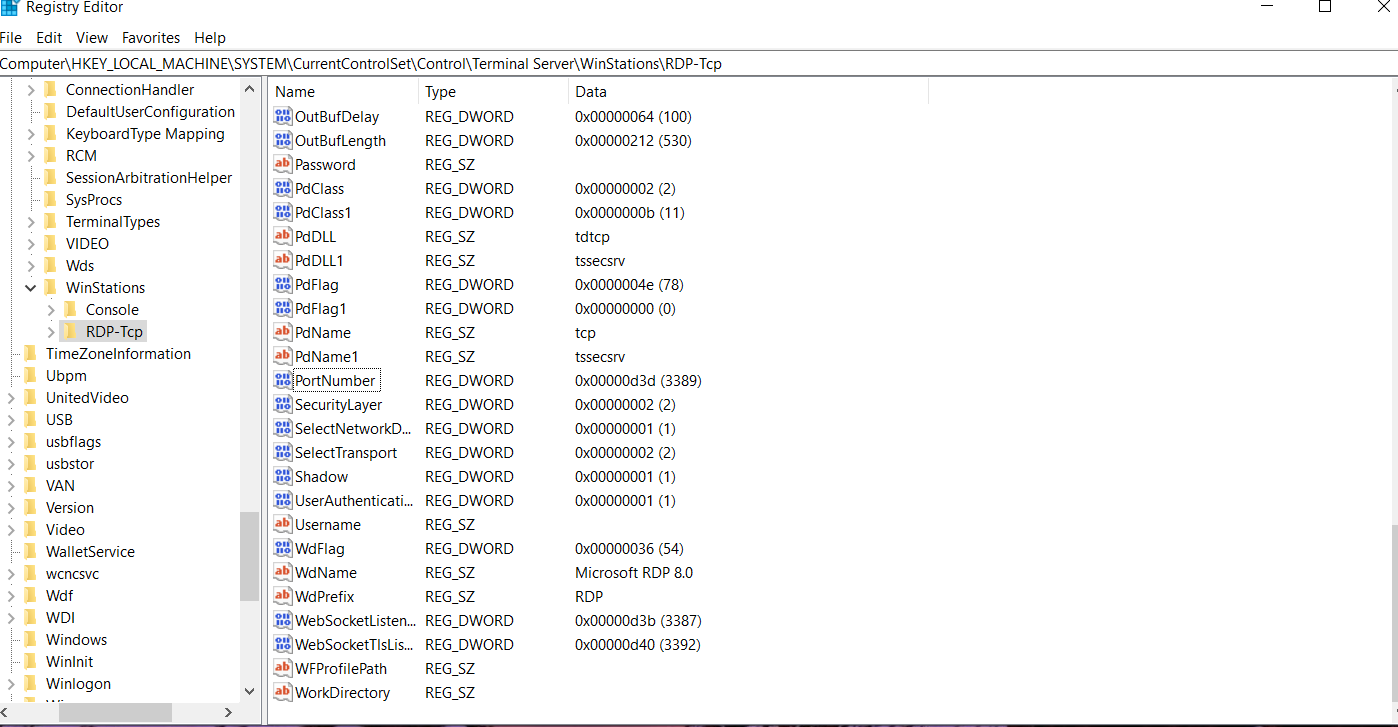
HKEY_LOCAL_MACHINE\System\CurrentControlSet\Control\Terminal Server\WinStations\RDP-Tcp
- Locate the “PortNumber”value and double-click on it.
- In the Edit DWORD Value window, select the Decimal base and enter the desired port number (e.g., 4000).

- Click OK to save the changes and Close the Registry Editor.
- Restart your computer for the changes to take effect.
Method 2: Changing the RDP Port Using PowerShell
PowerShell provides a convenient and efficient way to manage system configurations, including the RDP port number. Follow these steps to change the RDP port using PowerShell:
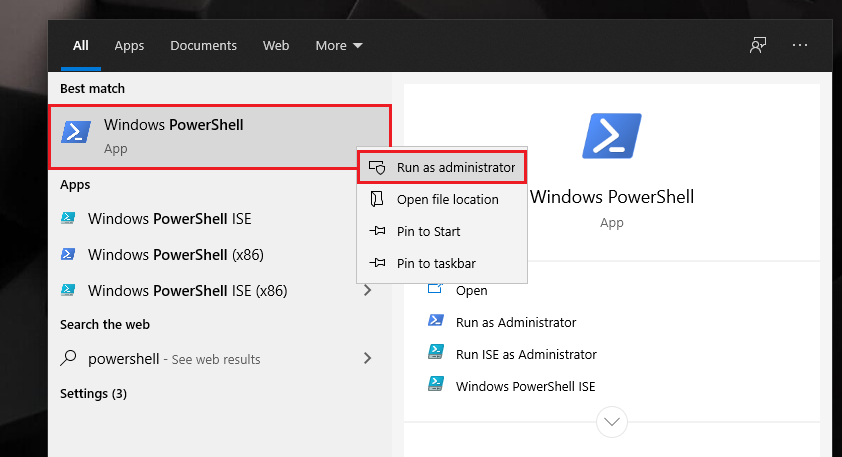
- Open Windows PowerShell as an administrator
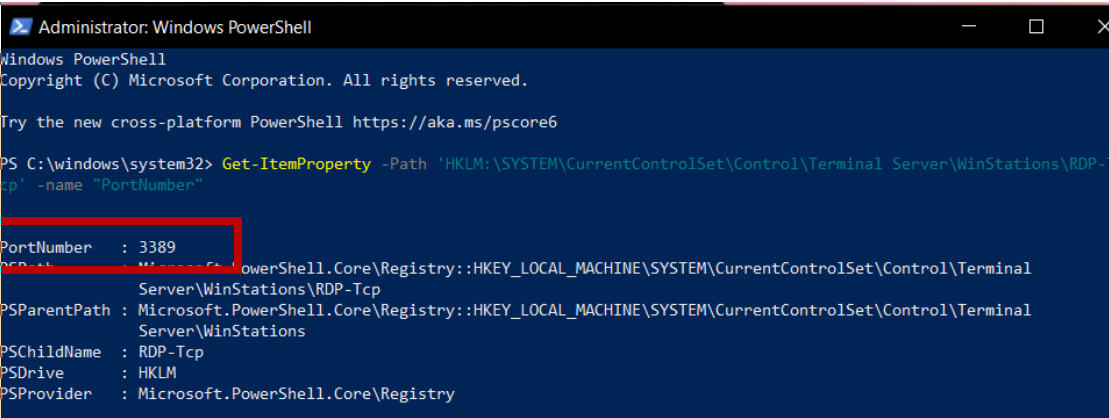
- Run the following command to check the current RDP port number:
| Get-ItemProperty -Path ‘HKLM:\SYSTEM\CurrentControlSet\Control\Terminal Server\WinStations\RDP-Tcp’ -name “PortNumber” |
- Note down the current port number for future reference.
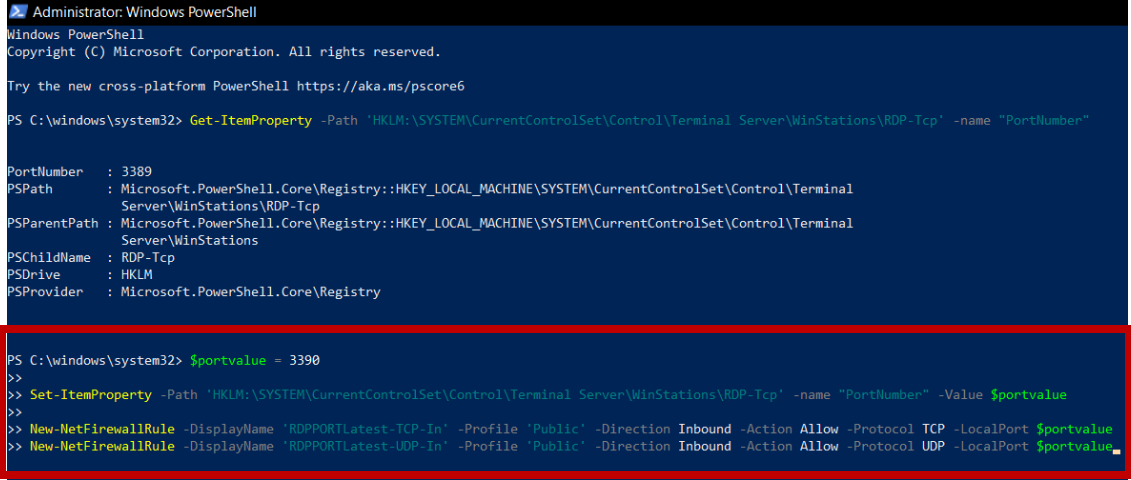
- To change the RDP port number, run the following command, replacing “new_port”with the desired port number $portvalue = new_port (e.g., 3390)
- Execute the following command to update the port number in the registry:
| Get-ItemProperty -Path ‘HKLM:\SYSTEM\CurrentControlSet\Control\Terminal Server\WinStations\RDP-Tcp’ -name “PortNumber” -Value $portvalue |
- Additionally, create new firewall rules to allow inbound TCP and UDP traffic on the new RDP port:
| New-NetFirewallRule -DisplayName ‘RDPPORTLatest-TCP-In’ -Profile ‘Public’ -Direction Inbound -Action Allow -Protocol TCP -LocalPort $portvalue
New-NetFirewallRule -DisplayName ‘RDPPORTLatest-UDP-In’ -Profile ‘Public’ -Direction Inbound -Action Allow -Protocol UDP -LocalPort $portvalue |
- Click enter and restart your computer to apply the changes.
Method 3: Configuring Windows Firewall for the New RDP Port
After changing the RDP port, you need to configure Windows Firewall to allow incoming connections on the new port. Follow these steps to open the new RDP port in Windows Firewall:
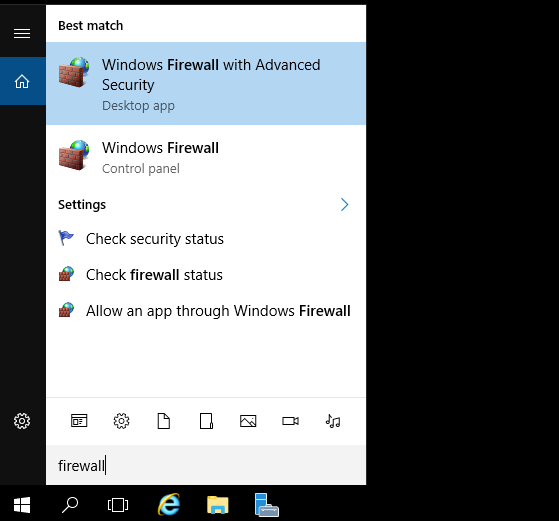
- Open the Windows Firewall with Advanced Securityby typing “firewall” in the search box and selecting the appropriate option.
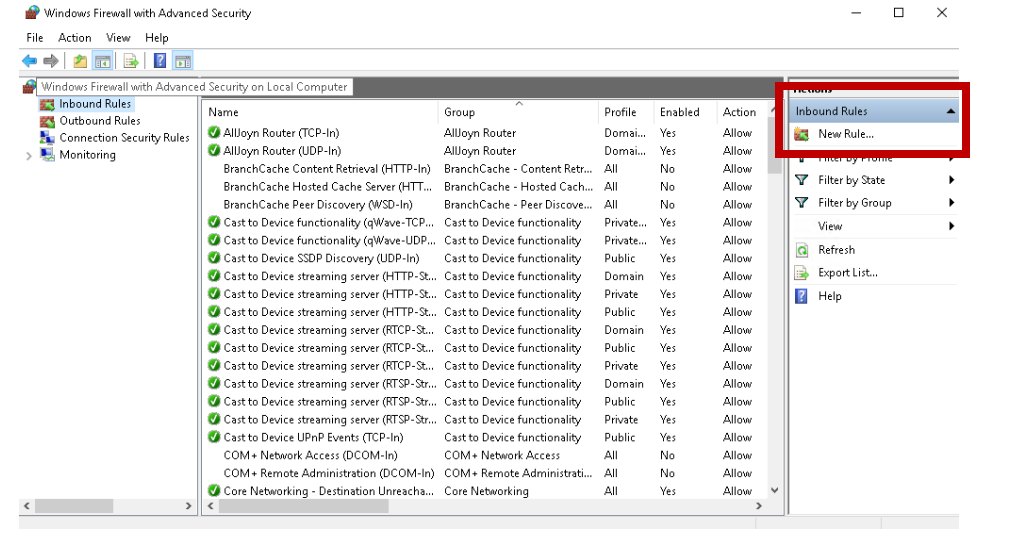
- In the Windows Firewall with Advanced Security window, right-click on Inbound Rules and select “New Rule”to create a new rule.
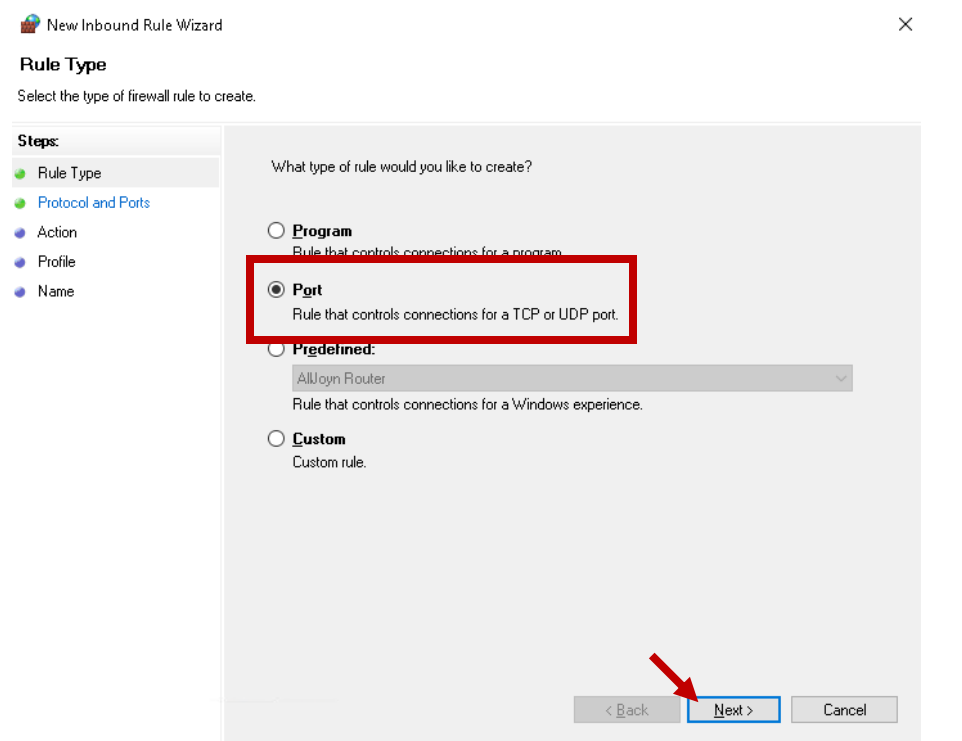
- Select the “Port” option and click Next.
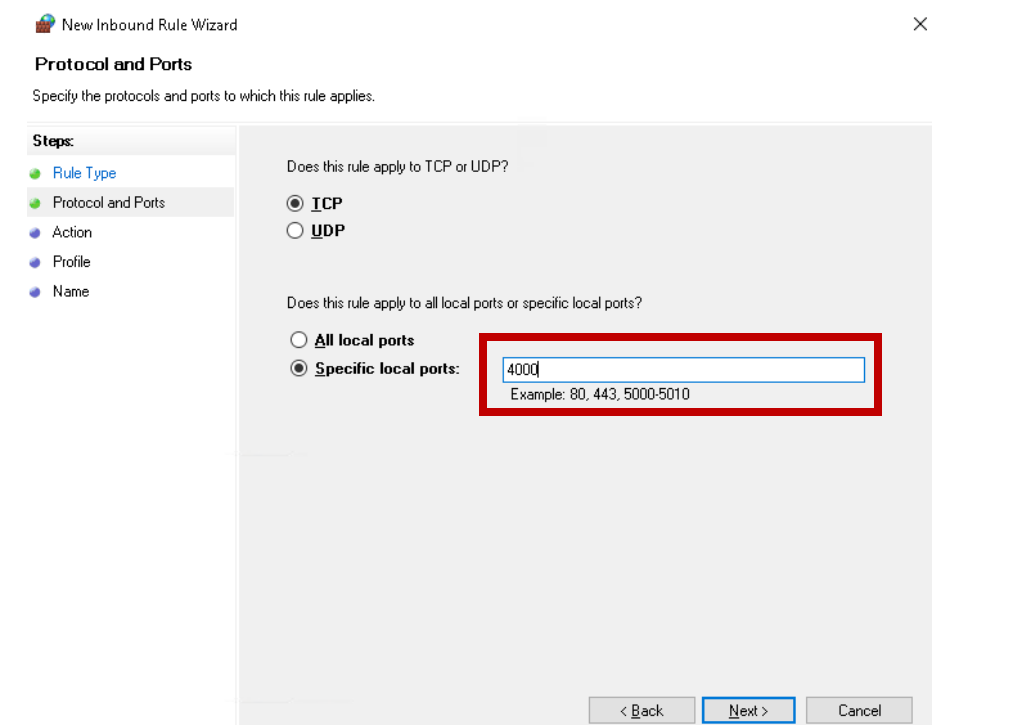
- Choose the appropriate connection type and enter the new RDP port number.
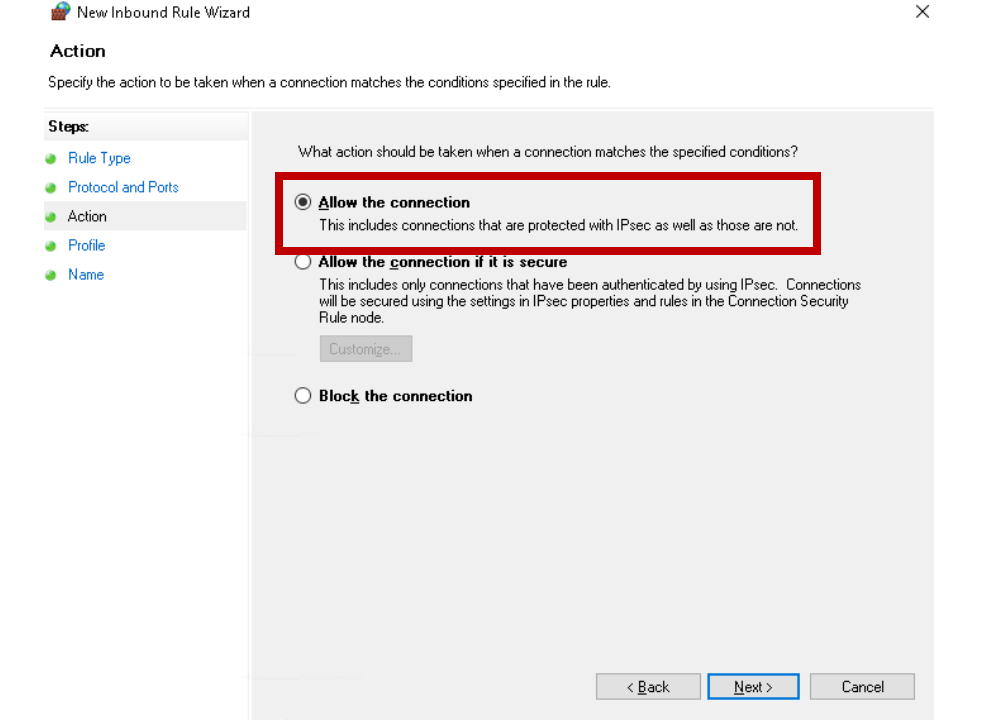
- Select “Allow the connection”and click Next.
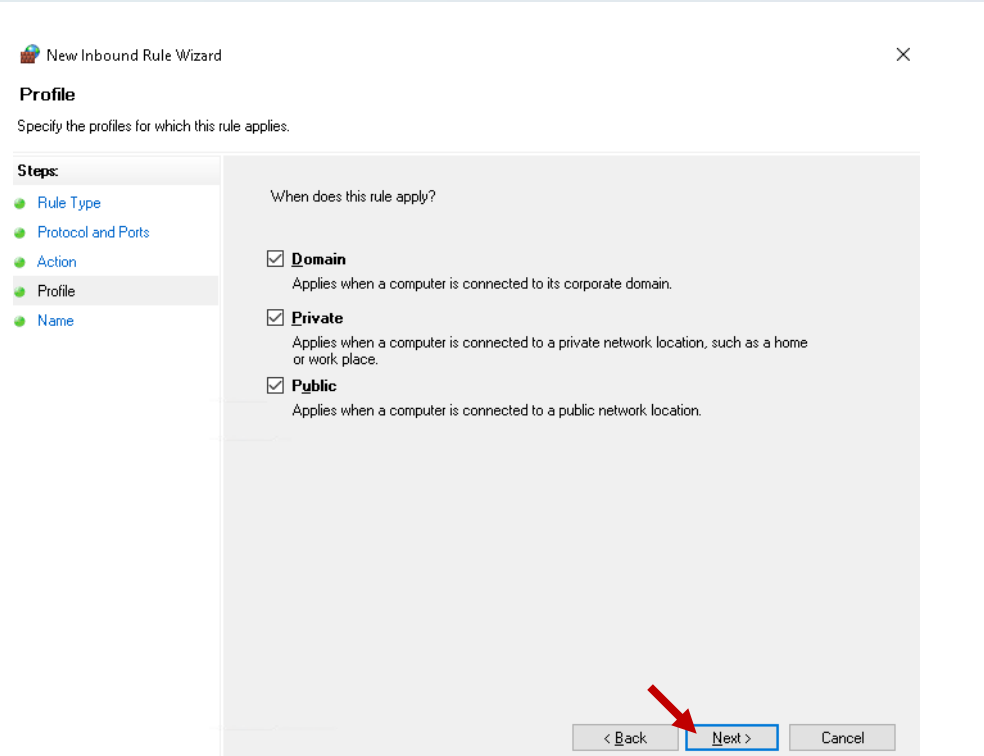
- Select the desired network locations for the rule to apply and click Next.
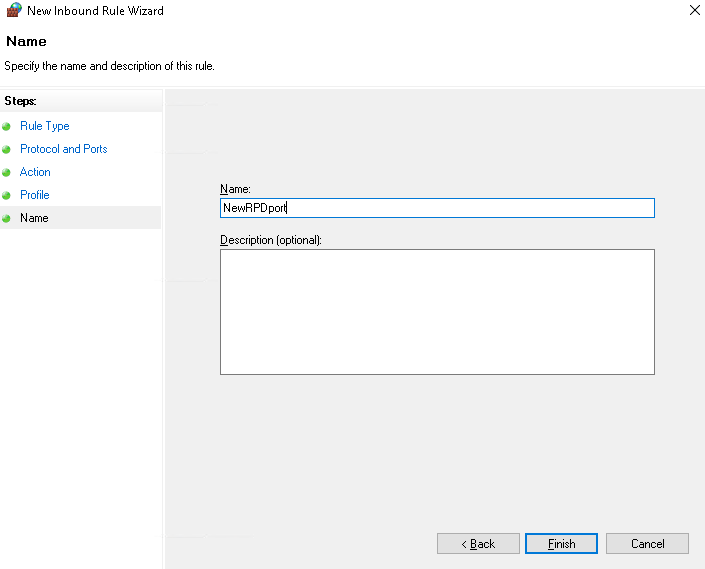
- Provide a name for the rule and click Finish.
- Restart your computer to ensure the changes take effect.
Testing the Connection
After changing the RDP port and configuring the Windows Firewall, it is essential to test the connection to ensure everything is functioning correctly. Till not want to follow such steps you might need to get RDP, many options might be available in market, consider TryRDP offers many custom plans. Follow these steps to test the connection:
- Open the Remote Desktop client on your computer.’
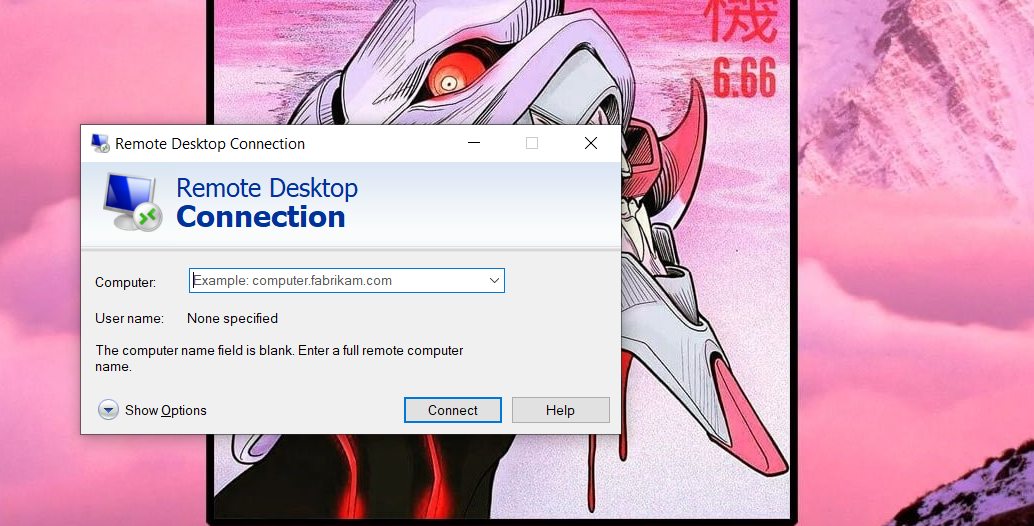
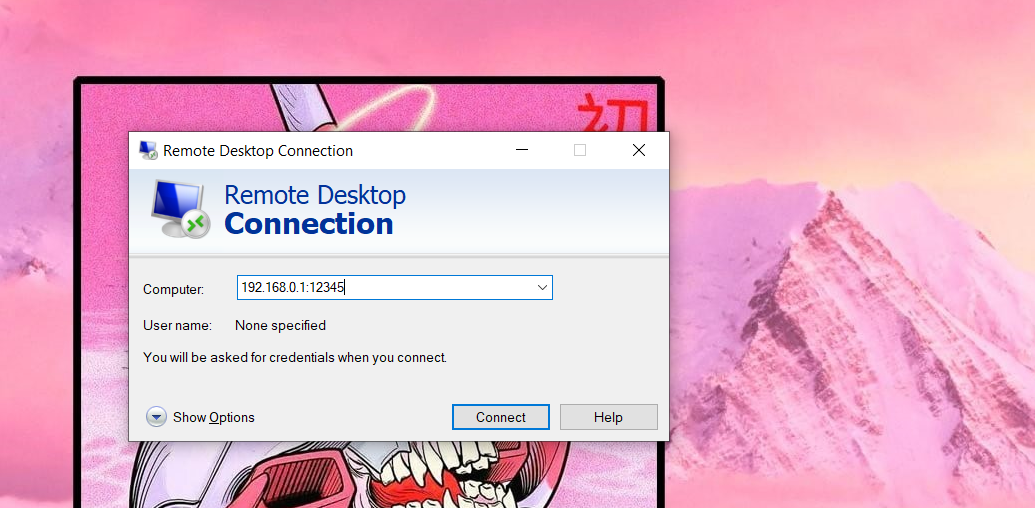
- Enter the IP address or hostname of the remote computer, followed by a colon and the new RDP port number (e.g., 192.168.0.1:12345).

- Click “Connect” to establish the remote desktop connection.
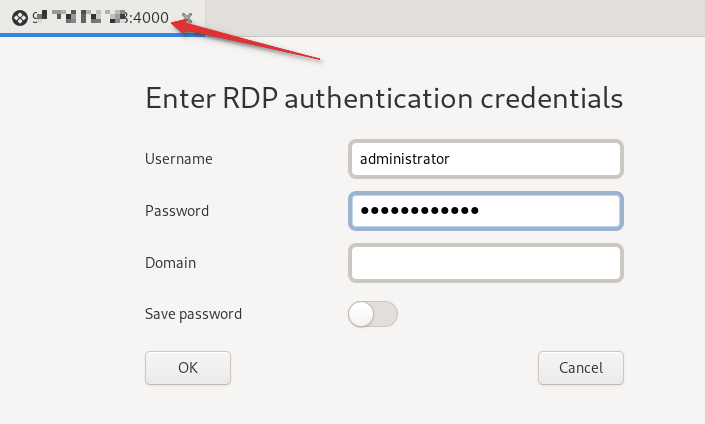
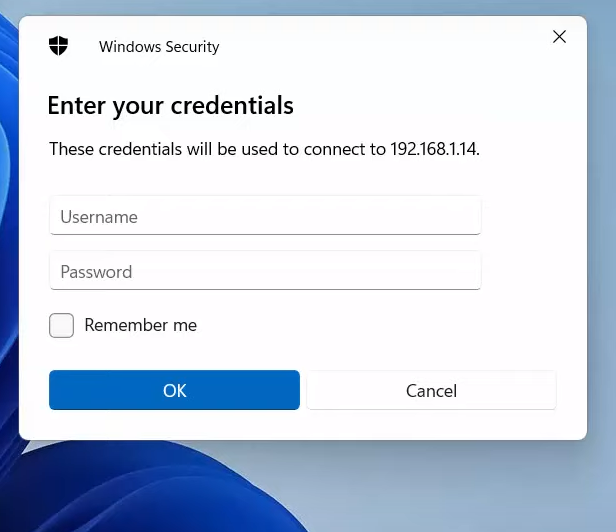
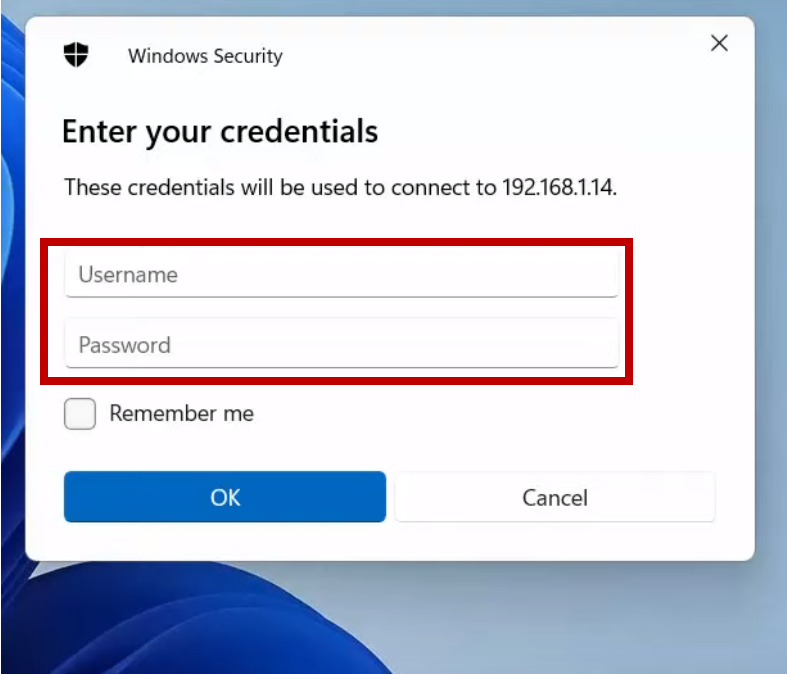
- If prompted, enter your login credentials and click “OK”.
- Once connected, verify that you can access remote resources and perform tasks as expected.
Conclusion
By following the steps outlined in this guide, you can successfully change the default RDP port and enhance the security of your remote systems. Remember to choose a unique and unused port number, configure the Windows Firewall accordingly, and test the connection to ensure everything is working as expected. Stay proactive in securing your remote access and protect your systems from potential threats.
People also ask:
Q1. Why should I change the default RDP port?
A: Changing the default RDP port adds an extra layer of security by making it harder for hackers to identify and target your RDP service.
Q2. What is the recommended range for RDP ports?
A: The recommended range for RDP ports is 1024-65535. However, it is essential to choose a port that is not already in use by another service or application.
Q3. Can I change the RDP port on Windows 10?
A: Yes, you can change the RDP port on Windows 10 using the methods mentioned in this guide. The steps may vary slightly, but the overall process remains the same.
Q4. Do I need to restart my computer after changing the RDP port?
A: Yes, it is recommended to restart your computer after changing the RDP port to ensure the changes take effect.
Q5. Can I use a third-party tool to change the RDP port?
A: Yes, there are third-party tools available that provide a user-friendly interface to change the RDP port. These tools handle the complex changes in the background while simplifying the process for users.


