CHKDSK Cannot Run Because the Volume is in Use? Fixed It in Seconds!
Although CHKDSK is a free and powerful disk repair tool, it is not without its problems. You may encounter a general error message when running CHKDSK to fix corrupted files.
This is the message format of the error: Cannot lock current drive. CHKDSK cannot run because the volume is in use by another process.
If you are searching for an effective solution to this issue, don’t worry as we have got you covered. In this article, we’ll explain why this problem occurs and what to do in such a situation. So, let’s dive in now!
Part 1: Reasons behind CHKDSK Cannot Run Because the Volume is in Use Error
Wondering why does the ‘CHKDSK cannot run because the volume is in use’ error occur? To effectively fix disk errors, CHKDSK requires exclusive access to the disk. In other words, CHKDSK needs to lock the drive and prevent any other files or processes from accessing it.
In this way, CHKDSK can perform its checks and repairs without interference, which can lead to more accurate results and better disk health. If files or processes are actively using the disk, CHKDSK won’t be able to lock the drive and won’t be able to proceed with its operation until the disk is available.
Part 2: Recover Data Before Fixing CHKDSK Cannot Run Because the Volume is in Use Error
Sometimes, running a disk check may damage files or directory structures, resulting in permanent data loss. Therefore, we highly recommend performing data recovery before attempting to fixing the ‘CHKDSK cannot run because the volume’ issue.
Tenorshare 4DDiG is a user-friendly and powerful tool designed to recover lost/deleted files from over 2000 storage devices. It provides an all-in-one solution for various data loss scenarios, such as virus attacks, accidental deletions, hardware failures, and more. The best part about 4DDiG is its impressive success rate and simplicity. Regardless of your skill level, all lost data can recovered in just a few clicks.
Given below is a step-by-step guide on how to get back your lost files with the help of 4DDiG:
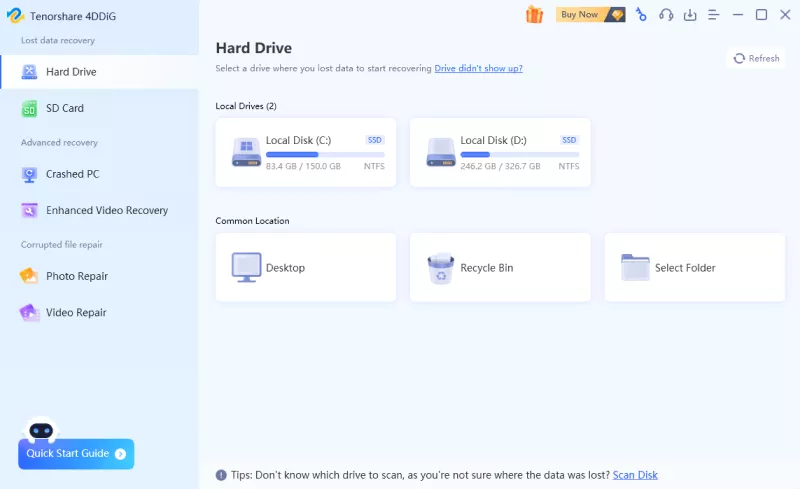
Step 1: Launch the 4DDiG Data Recovery once you’ve installed it. Then, select the drive where you lost data and click on the “Scan” button. To save time, you can specify the file types you want to recover before scanning.
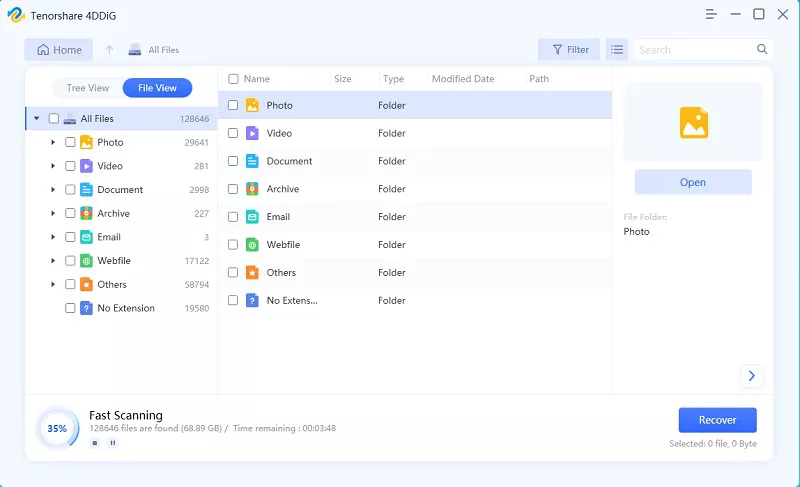
Step 2: 4DDiG offers two scanning modes: Quick Scan and Deep Scan. After the Quick Scan is completed, it will automatically initiate a Deep Scan on the selected disk. In the left panel, you are able to locate target files through either the tree view or the file view.
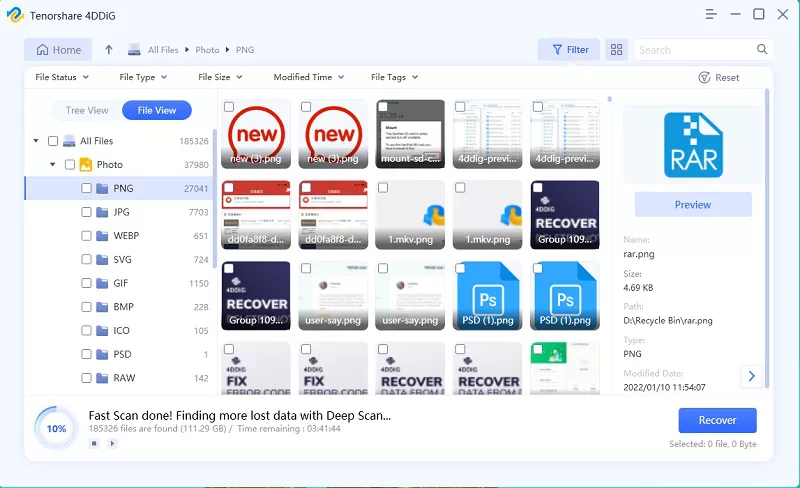
Step 3: Once the scan is complete, select the desired files and click on the “Recover” button. Then, simply select a secure location to save the recovered files.
Part 3: How to Fix CHKDSK Cannot Run Because the Volume is in Use Error?
Option A: Close all programs or restart your computer
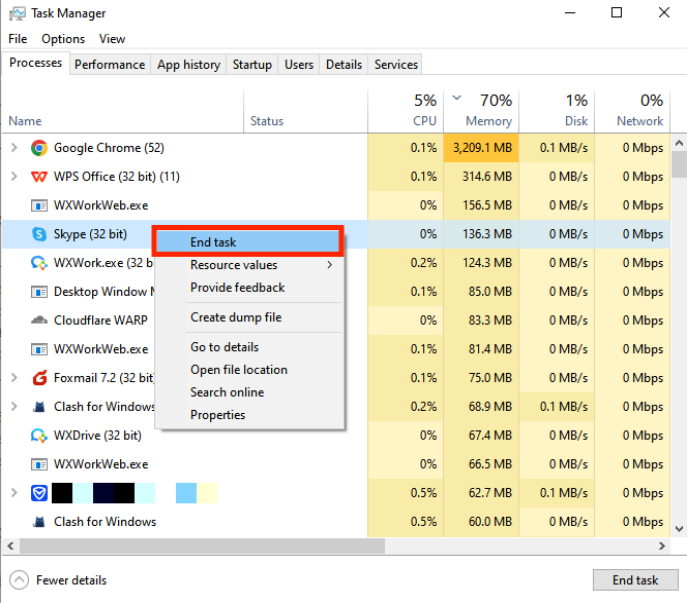
There are many scenarios where you may encounter the ‘CHKDSK cannot run because the volume’ issue. For example, you might try to run CHKDSK on a drive while having it open in File Explorer, or you might have a file open within that drive but forget to close it. In such cases, press Ctrl + Alt + Delete and select ‘Task Manager’ from the menu. Then, all you need to do is to terminate all programs or files that may be accessing the disk you want to check.
Even if you haven’t launched any programs, Windows itself runs multiple processes and services in the background. That’s why you see the error message ‘Windows can’t check the disk while it’s in use.’ So, it’s better to reboot you computer.
Option B: Run CHKDSK in Pre-boot environment
Another method to fix the ‘CHKDSK cannot run because the volume’ error is to boot into the Windows Recovery Environment. This is because it only loads essential drivers and services, minimizing the number of processes accessing your disk. To do so:
Step 1: Reboot your computer. During the start up, press F8 or the appropriate key to access WinRE.
Step 2: Navigate to “Troubleshoot” > “Advanced options” > “Command Prompt.”
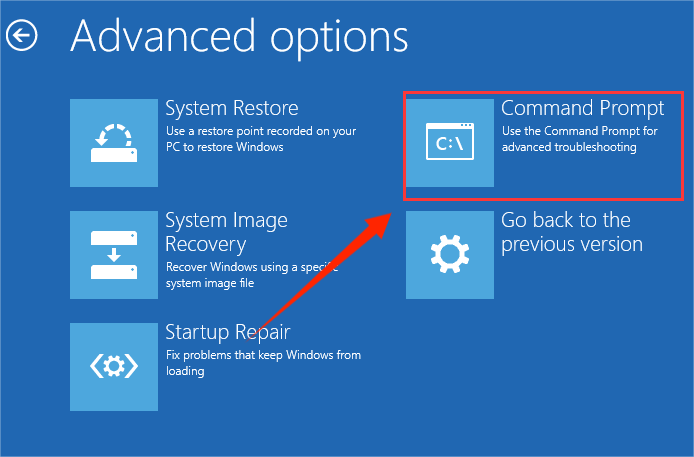
Step 3: Run the CHKDSK command again. Check if the ‘Windows can’t check the disk while it’s in use’ problem persists.
Option C: Run CHKDSK Command After Reboot
In fact, the answer lies in the error message you see, especially when you want to check the system drive. Windows will prompt you whether you would like to schedule this volume for a check the next time the system restarts. It’s a simple but effective solution for resolving the ‘CHKDSK cannot run because the volume is in use’ error.
So, type ‘Y’ for yes in Command Prompt and press Enter to execute it. During the next boot, CHKDSK will automatically run and repair any errors on the disk.
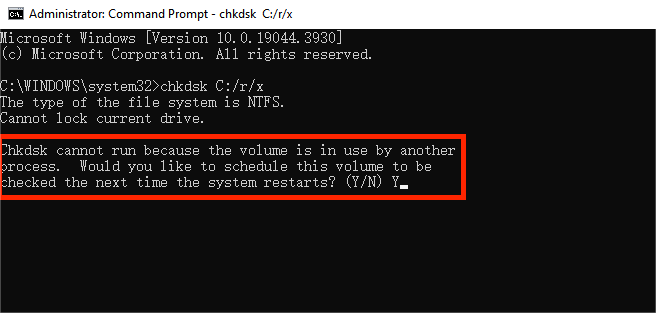
Wondering how to find the results of a CHKDSK that ran on boot? Follow these steps below:
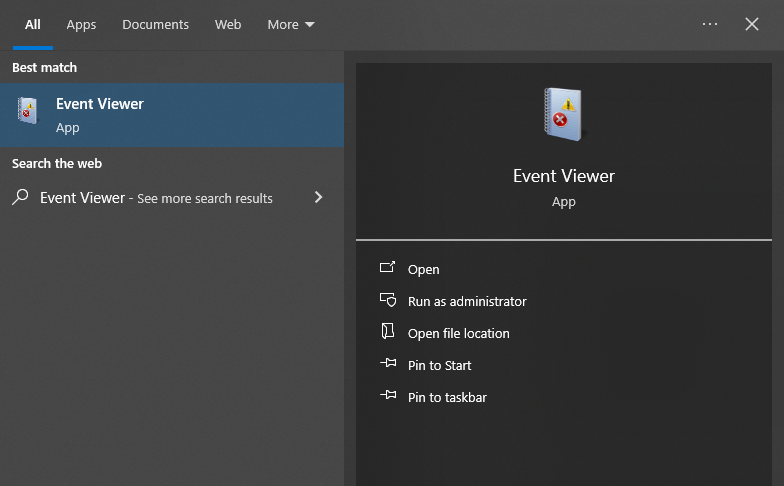
Step 1: Type “Event Viewer” into the search box. Then, click on the app from the search results.
Step 2: Go to “Windows Logs” > “Application.” Now, you need to look for an event with the source “Wininit” and the event ID “1001.”
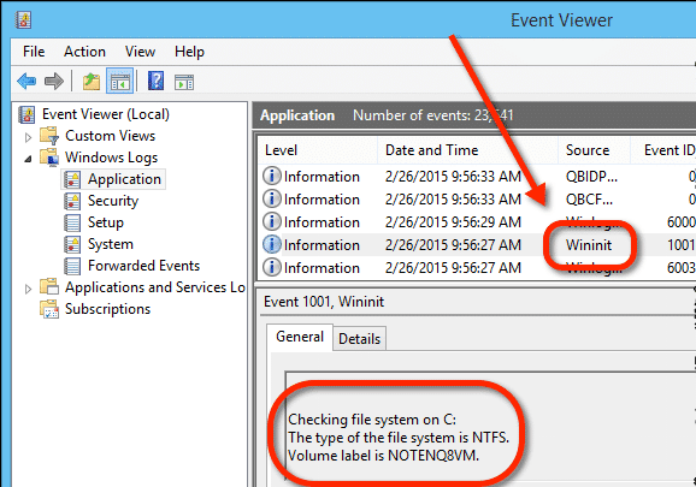
Step 3: Click anywhere within the text box under the “General” tab to select the entire CHKDSK result. Next, press Ctrl + A to select all text, followed by Ctrl + C.
Step 4: Open Notepad and press Ctrl + V to view the result.
Option D: Use CHKDSK alternatives
If all else fails to fix the ‘Windows can’t check the disk while it’s in use’ error, don’t panic. For Windows users, CHKDSK is not the only disk error-checking tool available. There are several CHKDSK alternatives that can do the same job. Some reliable options include:
- DiskGenius
- EaseUS Partition Master
- MiniTool Partition Wizard
- AOMEI Partition Assistant
- 4DDiG Partition Manager
Wrap Things Up
Now, you should be good to go. It’s quite common to encounter the ‘CHKDSK cannot run because the volume is in use’ error. However, we’ve shared four easy yet effective solutions to try, from restarting your computer to employing a CHKDSK alternative. Additionally, to avoid data loss issue caused by disk check, you can utilize 4DDiG Data Recovery to retrieve your important files in advance.


