Apple recently released iOS 17 first public beta version, causing excitement among many Apple fans who eagerly want to update their devices. However, several iPhone users have encountered issues after upgrading to iOS 17, including app crashes, high memory consumption, and fast battery drain. The abundance of bugs has led to a poor user experience, prompting the desire to revert to the iOS 16 system.
Downgrading from iOS 17 Beta
Are you feeling regretful about upgrading to iOS 17 beta? Fortunately, as long as Apple keeps the verification channel open for the official iOS 16 system, users who have upgraded to iOS 17 can downgrade to the latest official version of iOS 16. Today, we will provide a tutorial on downgrading iOS 17, so let’s dive in!
Considerations for Downgrading from iOS 17
Downgrading from iOS 17 is only possible to the development signature certification version of iOS 16.
Downgrading from iOS 17 beta will erase all data on the device, so it is essential to create a backup beforehand. We recommend using iTunes to back up the entire machine.
Backup data from the new version of iOS 17 beta cannot be restored to the previous iOS 16 system. You can only choose an old iOS 16 backup for restoration, whether from iCloud or iTunes.
If no backup was made before upgrading to iOS 17 beta, restoring iOS 17 data through an iCloud backup is impossible after downgrading.
The editor suggests using a third-party tool called Niu Xuechang Apple Phone Repair Tool for the downgrade process. This tool is user-friendly and facilitates a quick return to the official version of the system before Apple closes the verification channel. Additionally, it supports resolving various iOS systems issues like black screen, white apple, and crashes, making it ideal for novice users.
Steps to Downgrade:
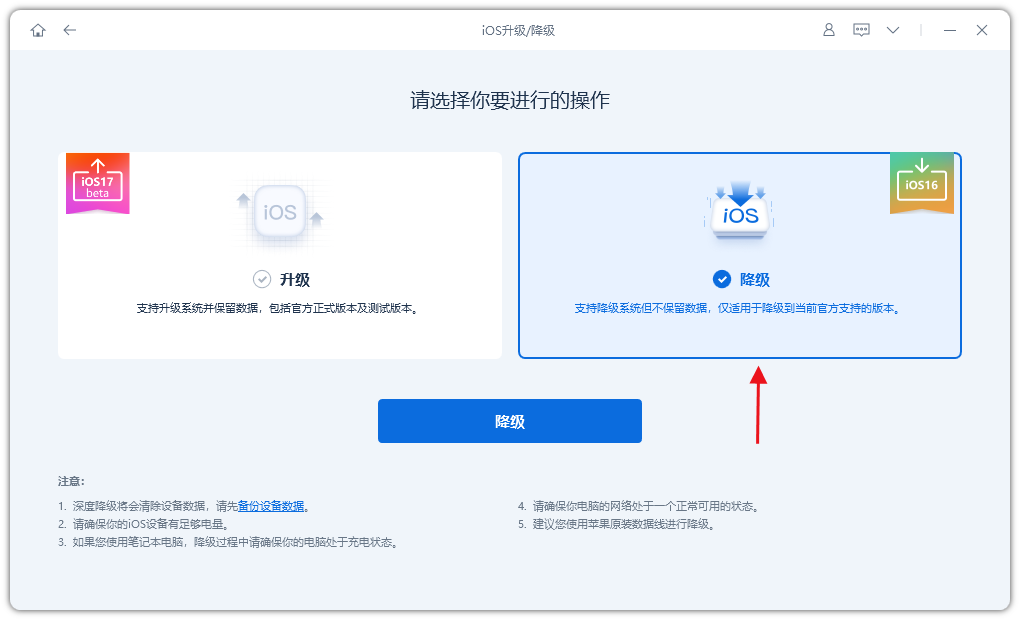
Step 1: Launch the tool, connect your device to the computer using a data cable, click “iOS upgrade/downgrade,” and select the “downgrade” mode.
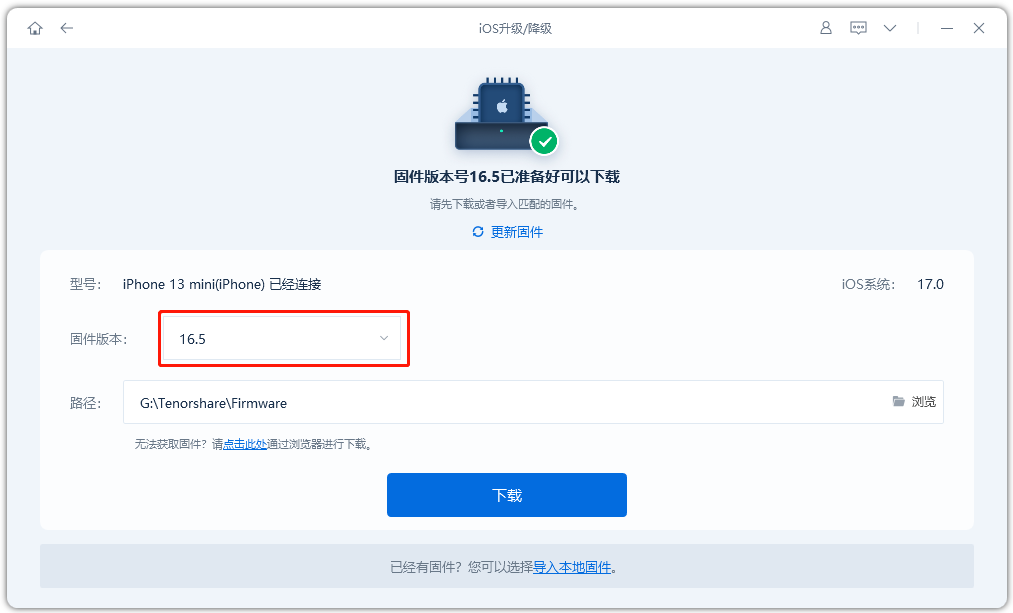
Step 2: On the system downgrading interface, the tool will display the official version of the system that your iPhone supports downgrading to. Click “Download Firmware” and wait for the firmware download to complete.
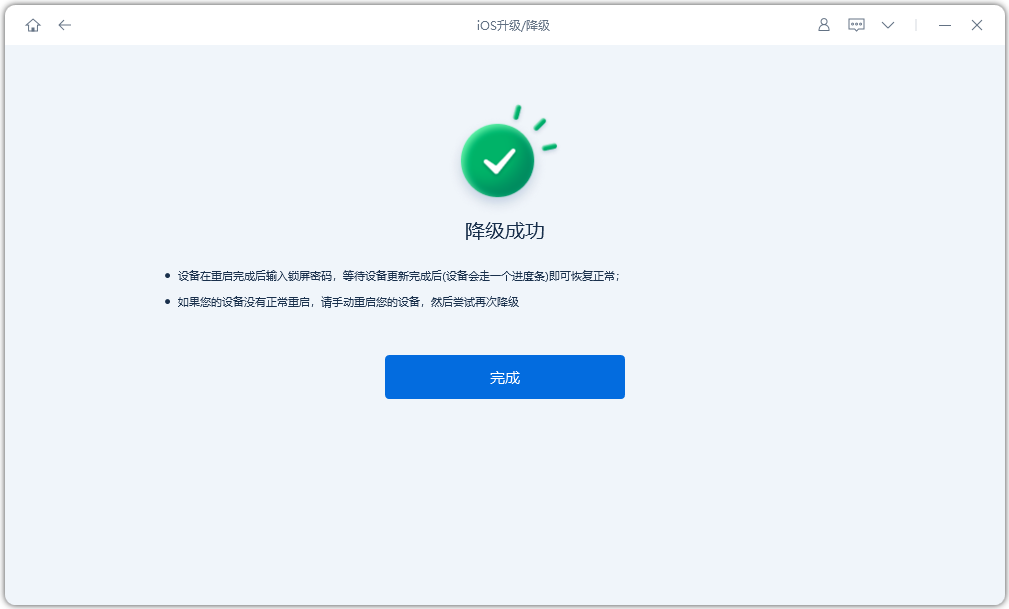
Step 3: Successful downgrade of the iPhone. Once the firmware download is finished, the iOS downgrade process can commence.
The entire downgrade process typically takes around 10 minutes. Ensure not disconnecting the data cable and patiently wait for the “downgrade successful” message to appear.
Read Also: iOS 17 Beta 2 Beta Released: A Step-by-Step Guide.
Do not forget to follow us on our Facebook group and page to keep you always aware of the latest advances, News, Updates, review, and giveaway on smartphones, tablets, gadgets, and more from the technology world of the future.


